

Mocha is a feature-rich JavaScript test framework running on Node.js and in the browser, making asynchronous testing simple and fun. Mocha tests run serially, allowing for flexible and accurate reporting, while mapping uncaught exceptions to the correct test cases.
Mocha is free and open source, licensed under the MIT license.
If you want to learn more on Mocha, see official Mocha documentation.
Screens
Run unit tests with Mocha
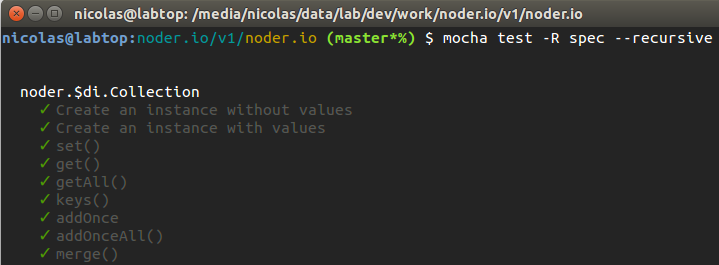
Result of unit tests with Mocha

Installation
There are several ways to use Mocha, here is a quick tour.
In structures Javascript, it is usual to place the unit tests in the /test directory
For comfort, creates a config file (mocha.opts) in the /test directory.
You can copy my mocha.opts file and adjust it, if necessary.
For Node.js
Global
Install globally for directly use the command mocha. This is the most practical way.
npm install -g mocha
With this installation, Mocha runs with the command:
mocha test
Local
Install locally.
npm install mocha --save-dev
With this installation, several ways to launch Mocha.
Open the terminal to the root of your project to test.
cd /path/of/your/project/to/test
Directly:
./node_modules/mocha/bin/mocha test
Huh, it's long :(
Personally I like to run my tests with the command npm test.
To do this, add in your package.json file:
"scripts": {
  "test": "mocha test"
}
Now, you can run your unit tests with the command:
npm test
It's much better :)
Also you can use a Makefile for run your tests with the command make, for this creates a Makefile with this contents:
test:
    @NODE_ENV=test ./node_modules/mocha/bin/mocha test

.PHONY: test
You can run your unit tests with the command:
make test
If you prefer to place the configuration in the command instead of mocha.opts file.
REPORTER = spec

test:
    @NODE_ENV=test ./node_modules/mocha/bin/mocha test \
    --reporter $(REPORTER) \
    --recursive

.PHONY: test
Commands
Usage: mocha [debug] [options] [files]
You can initialize a client-side mocha setup at path for running your unit tests in the browser
mocha init path;
The init command generates the files in the specified path to build your unit tests to be performed with the browser.
Then add:
<script src="unit.js"></script>
Example:
<!DOCTYPE html>
<html>
  <head>
    <title>Unit.js tests in the browser with Mocha</title>
    <meta http-equiv="Content-Type" content="text/html; charset=UTF-8">
    <meta name="viewport" content="width=device-width, initial-scale=1.0">
    <link rel="stylesheet" href="mocha.css" />
  </head>
  <body>
    <h1>Unit.js tests in the browser with Mocha</h1>
    <div id="mocha"></div>
    <script src="mocha.js"></script>
    <script src="unit.js"></script>
    <script>
      mocha.setup('bdd');
    </script>
    <script src="tests.js"></script>
    <script>
      mocha.run();
    </script>
  </body>
</html>
Writes your unit tests in the tests.js file.
If you want to display the stats of assertions executed, look at this implementation of test.stats.
Commands help
mocha --help
or alias of --help
mocha -h
Options list
| Option | Description |
|---|---|
| -h, --help | output usage information |
| -V, --version | output the version number |
-r, --require <name> |
require the given module |
-R, --reporter <name> |
specify the reporter to use |
-u, --ui <name> |
specify user-interface (bdd|tdd|exports) |
-g, --grep <pattern> |
only run tests matching <pattern> |
| -i, --invert | inverts --grep matches |
-t, --timeout <ms> |
set test-case timeout in milliseconds [2000] |
-s, --slow <ms> |
"slow" test threshold in milliseconds [75] |
| -w, --watch | watch files for changes |
| -c, --colors | force enabling of colors |
| -C, --no-colors | force disabling of colors |
| -G, --growl | enable growl notification support |
| -d, --debug | enable node's debugger, synonym for node --debug |
| -b, --bail | bail after first test failure |
| -A, --async-only | force all tests to take a callback (async) |
| -S, --sort | sort test files |
| --recursive | include sub directories |
| --debug-brk | enable node's debugger breaking on the first line |
--globals <names> |
allow the given comma-delimited global [names] |
| --check-leaks | check for global variable leaks |
| --interfaces | display available interfaces |
| --reporters | display available reporters |
--compilers <ext>:<module>,... |
use the given module(s) to compile files |
| --inline-diffs | display actual/expected differences inline within each string |
| --no-exit | require a clean shutdown of the event loop: mocha will not call process.exit |
mocha.opts
Mocha will attempt to load ./test/mocha.opts, these are concatenated with process.argv, though command-line args will take precedence. For example the mocha.opts file:
--reporter spec
--recursive
--growl
- use the spec reporter
- include sub directories
- enable growl notification support
Now the command:
mocha test
is equal to the command:
mocha test --reporter spec --recursive --growl
See also mocha.opts on the official documentation.
Generate a spec documentation
You can generate an API spec documentation of your application from your unit tests !
Example, all spec of Unit.js documentation are generated with Mocha:
- spec of value asserter
- spec of exception asserter
- and more ... you can access via the navbar.
Generate a markdown spec doc
The markdown reporter generates a markdown TOC (Table Of Content) and body for your test suite. This is great if you want to use the tests as documentation within a Github wiki page, or a markdown file in the repository that Github can render.
mocha path/of/your/tests-file.js -R markdown > destination/path/spec.md
Generate a markdown documentation from all tests files of a directory:
mocha path/of/your/directory -R markdown > destination/path/spec.md --recursive
Generate a HTML spec doc
The HTML reporter generates a HTML documentation for your test suite.
mocha path/of/your/tests-file.js -R doc > destination/path/spec.html
Generate a HTML documentation from all tests files of a directory:
mocha path/of/your/directory -R doc > destination/path/spec.html --recursive
File of unit tests
Structure example:
var test = require('unit.js')

describe('My module', function() {

  var MainClass = require('my-module/lib/main');

  it('load', function() {

    var myModule  = require('my-module');

    test
      .function(myModule)
        .hasName('MyModule')

      .object(myModule())
        .isInstanceOf(MainClass)
    ;
  });

  describe('Main class', function() {

    it('emit() - emit an event', function() {

      var spy  = test.spy();
      var main = new MainClass();

      var listener = function(value) {

        spy();

        // test the value emitted
        test.string(value)
          .isIdenticalTo('value of any event');
      };

      test
        .given('add listener', function() {
          main.on('any.event', listener);
        })

        .when('emit an event', function() {
          main.emit('any.event', 'value of any event');
        })

        .then(function() {

          test
            .function(main.listeners('any.event'))

            .bool(spy.calledOnce)
              .isTrue()
          ;
        })
    });

    it('connection', function(done) {

      // asynchronous test

      main.get('http://localhost/api/show/item', function(err, json, headers) {

        var now = new Date();

        if(err) {
          test.fail(err.message);
        }

        test
          .value(headers)
            .hasHeaderJson()

          .object(json)
            .hasKey('title', 'item title')
            .hasKey('description')

          .date(json.updatedAt)
            .isBefore(now)
        ;

        done();
      });

    });
  });

});
TIPS
Only suite or test-case
The exclusivity feature allows you to run only the specified suite or test-case by appending .only() to the call as shown here:
describe('Array', function(){
  describe.only('#indexOf()', function(){
    ...
  });
});
Or a specific test-case:
describe('Array', function(){
  describe('#indexOf()', function(){
    it.only('should return -1 unless present', function(){

    });

    it('should return the index when present', function(){

    });
  })
});
Note that currently only one .only() call is respected, this effectively turns into a --grep.
Ignore suite(s) or test-case(s)
This feature is similar to .only(), however by appending .skip() you may tell Mocha to simply ignore these suite(s) and test-case(s).
This puts them in a pending state, and is favoured over commenting out tests which you may forget to uncomment.
Ignore these suite:
// TODO: write tests of Article model
describe.skip('Article', function() {

  it('read an article', function() {
    // ...
  });

  it('create an article', function() {
    // ...
  });

  it('remove an article', function() {
    // ...
  });

  it('delete an article', function() {
    // ...
  });
});
Ignore these test-case:
it.skip('create()', function() {
  // TODO: write MainClass.create()
});